Homemade Reese’s Cups Dark Chocolate
Highlighted under: Everyday Baking Joy
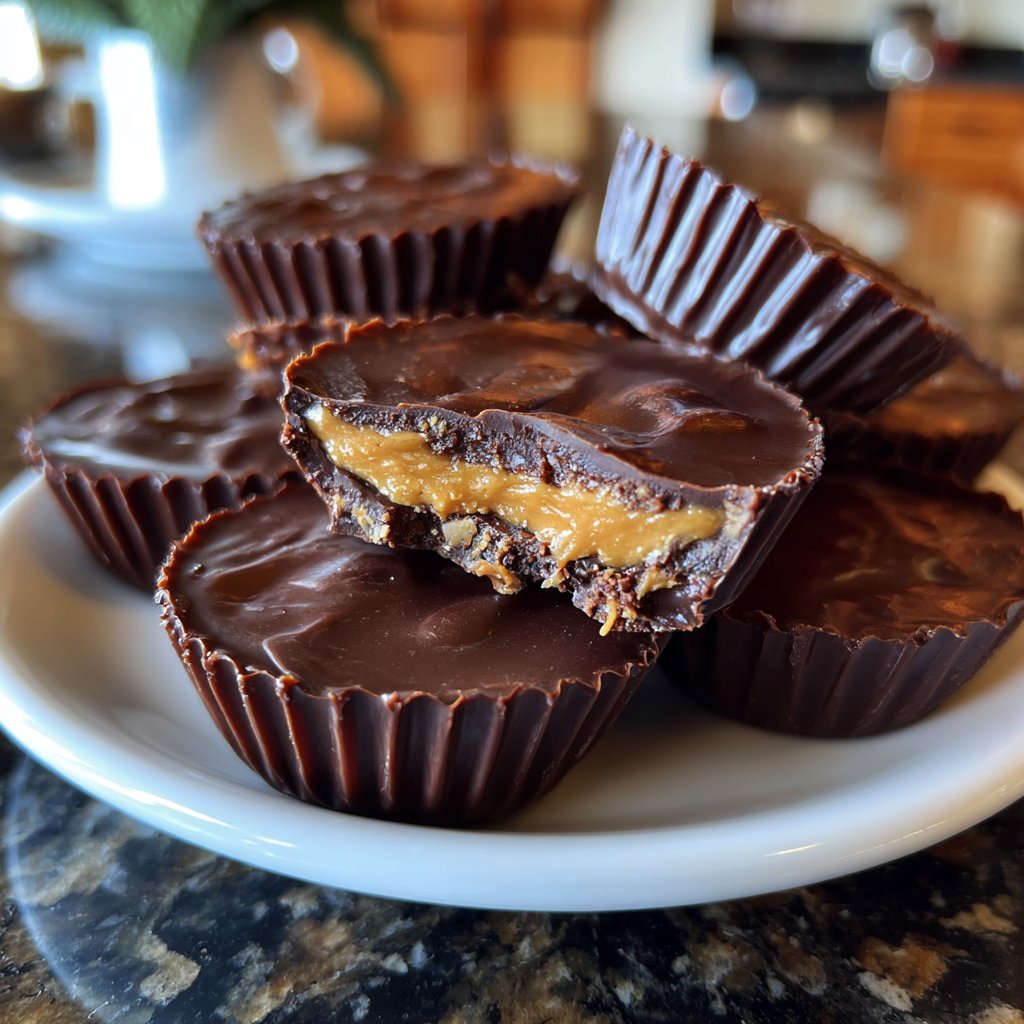
I absolutely love making my own version of Reese's Cups using dark chocolate. Not only do I get to control the ingredients, but I also enjoy the rich, decadent flavor that dark chocolate brings to the table. With just a few simple components, I can whip up a batch of these indulgent treats in under an hour. They're perfect for satisfying my sweet tooth or as gifts for friends and family. Plus, the satisfaction of knowing they're homemade makes them taste even better!
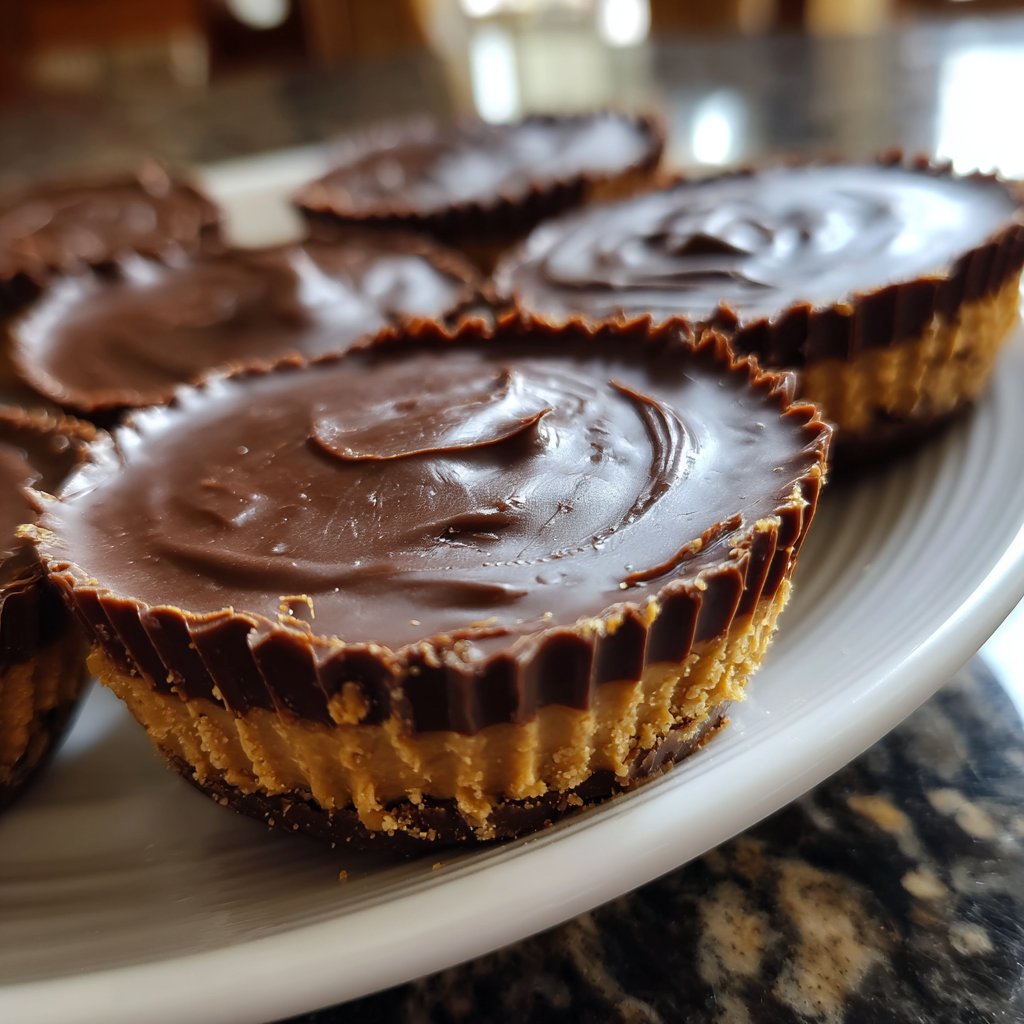
Making my own Reese’s Cups with dark chocolate was a game-changer for me. I really enjoyed experimenting with different nut butters to find the perfect balance. On my first attempt, I started with creamy peanut butter, but found that a mix of crunchy and smooth gave a delightful texture that complemented the rich chocolate perfectly. This balance is crucial for achieving that classic Reese’s Cups experience.
The melting process was fun, too! I discovered that tempering the dark chocolate yields a shiny finish and helps prevent a dull, chalky texture. As I watched the chocolate glide smoothly into the molds, I could hardly wait for them to set. The end result was surely a treat that will keep my friends asking for more!
Why You'll Love This Recipe
- Delectable dark chocolate that brings a gourmet touch to a beloved classic
- Customizable filling options to suit any preference, from nut butters to vegan alternatives
- Satisfying crunch in every bite, making it a delightful indulgence
Mastering the Chocolate Melt
Achieving the perfect melt for your dark chocolate is crucial for a smooth and glossy finish. When microwaving, use glass or ceramic bowls since they retain heat well and won't get too hot too quickly, which can burn the chocolate. Stirring every 30 seconds not only ensures even melting but also prevents overheating. If your chocolate seizes, adding a tiny bit of coconut oil can help bring it back to a workable consistency.
Dark chocolate can vary in cocoa content and flavor, so selecting high-quality chips is key. I recommend a blend with around 70% cocoa for the best rich taste paired with the sweetness of the filling. Avoid using chocolate that already contains emulsifiers, as these can impact the shiny finish you’re aiming for in your homemade cups.
Customizing Your Filling
While peanut butter is a classic for these cups, you can easily switch it up to suit dietary needs or preferences. For a nut-free version, sunflower seed butter works beautifully and maintains the creamy texture you want. If you prefer a sweeter filling, increasing the powdered sugar to 1/3 cup can enhance the taste without being overwhelming. This flexibility allows you to cater to various tastes and nutritional requirements.
Texture is also an important factor when it comes to fillings. If you’re making these for a special occasion, consider adding finely chopped nuts or crispy rice cereal to the filling for an additional crunch. This variation adds an exciting contrast to the smoothness of the chocolate and can elevate the overall experience of biting into your homemade treat.
Ingredients
Ingredients
For the Chocolate Cups
- 1 cup dark chocolate chips
- 1 tablespoon coconut oil
For the Filling
- 1/2 cup creamy peanut butter or almond butter
- 1/4 cup powdered sugar
- 1/2 teaspoon vanilla extract
Make sure to measure everything carefully for the best results.
Instructions
Instructions
Melt the Chocolate
In a microwave-safe bowl, combine dark chocolate chips and coconut oil. Heat in 30-second intervals, stirring in between, until the mixture is completely melted and smooth.
Prepare the Molds
Line a muffin tin with paper liners. Pour a spoonful of melted chocolate into the bottom of each liner, enough to coat the base. Tap the tin gently on the counter to level the chocolate.
Make the Filling
In a separate bowl, mix together the peanut butter, powdered sugar, and vanilla until smooth and creamy. Place a dollop of this mixture into the center of each chocolate-filled liner.
Top with More Chocolate
Pour the remaining melted chocolate over the filling, ensuring it’s completely covered. Tap the tin again to remove any air bubbles and smooth out the surface.
Chill to Set
Refrigerate the cups for about 15 minutes or until the chocolate is completely hardened. Once set, gently peel away the liners and enjoy your homemade treats!
Store any leftovers in an airtight container at room temperature or in the refrigerator.
Pro Tips
- Try using different types of nut butters or even sunflower seed butter for a nut-free option. You can also add a sprinkle of sea salt on top for an extra flavor boost!
Storage and Shelf Life
These dark chocolate cups can be stored in an airtight container in the refrigerator for up to two weeks. Keeping them chilled helps maintain their shape and texture, especially on warmer days. If you're planning to keep them for longer, consider freezing them in a single layer on a baking sheet, then transferring them to a zip-top freezer bag. This way, they can last up to three months without losing their integrity.
When you’re ready to enjoy a frozen cup, simply let it sit at room temperature for about 10–15 minutes before indulging. This will give the chocolate a chance to soften slightly, while still retaining that satisfying crunch.
Troubleshooting Common Issues
If your chocolate cups don’t set properly after chilling, it might be due to not enough chocolate being used in the initial layers. Ensure each layer is adequately coated with chocolate before adding your filling to avoid sogginess. If you find that the filling is overflowing when adding the final chocolate layer, simply freeze the filled cups briefly before adding the top layer; this helps to keep everything nicely tucked inside.
Should your chocolate crack after cooling, try using a slightly lower melting temperature next time, as overheating can lead to a brittle finish. Reheating the chocolate gently in a microwave can restore its smoothness before application, but be wary not to overheat again!
Questions About Recipes
→ Can I use milk chocolate instead of dark chocolate?
Yes, you can use milk chocolate, but it will alter the flavor profile, making it sweeter.
→ How long do these cups last?
When kept in an airtight container, they can last for about a week at room temperature or up to two weeks in the refrigerator.
→ Can I make these vegan?
Absolutely! Use dairy-free chocolate chips and a vegan nut butter to make them plant-based.
→ What can I use instead of coconut oil?
You may substitute with vegetable oil or butter if preferred, but coconut oil helps the chocolate to set nicely.
Homemade Reese’s Cups Dark Chocolate
Created by: Aubrey Collins
Recipe Type: Everyday Baking Joy
Skill Level: Beginner
Final Quantity: 12 servings
What You'll Need
For the Chocolate Cups
- 1 cup dark chocolate chips
- 1 tablespoon coconut oil
For the Filling
- 1/2 cup creamy peanut butter or almond butter
- 1/4 cup powdered sugar
- 1/2 teaspoon vanilla extract
How-To Steps
In a microwave-safe bowl, combine dark chocolate chips and coconut oil. Heat in 30-second intervals, stirring in between, until the mixture is completely melted and smooth.
Line a muffin tin with paper liners. Pour a spoonful of melted chocolate into the bottom of each liner, enough to coat the base. Tap the tin gently on the counter to level the chocolate.
In a separate bowl, mix together the peanut butter, powdered sugar, and vanilla until smooth and creamy. Place a dollop of this mixture into the center of each chocolate-filled liner.
Pour the remaining melted chocolate over the filling, ensuring it’s completely covered. Tap the tin again to remove any air bubbles and smooth out the surface.
Refrigerate the cups for about 15 minutes or until the chocolate is completely hardened. Once set, gently peel away the liners and enjoy your homemade treats!
Extra Tips
- Try using different types of nut butters or even sunflower seed butter for a nut-free option. You can also add a sprinkle of sea salt on top for an extra flavor boost!
Nutritional Breakdown (Per Serving)
- Calories: 380 kcal
- Total Fat: 26g
- Saturated Fat: 15g
- Cholesterol: 195mg
- Sodium: 85mg
- Total Carbohydrates: 32g
- Dietary Fiber: 3g
- Sugars: 24g
- Protein: 6g