Chocolate Hazelnut Tart
Highlighted under: Everyday Baking Joy
I absolutely love making this Chocolate Hazelnut Tart. The combination of rich chocolate and crunchy hazelnuts creates an indulgent dessert that is hard to resist. Each bite melts in my mouth, offering a perfect balance of sweetness and nutty flavor. I often make this tart for gatherings, and it never fails to impress my friends and family. The best part? It’s surprisingly simple to prepare while delivering a gourmet experience that feels like a luxurious treat.
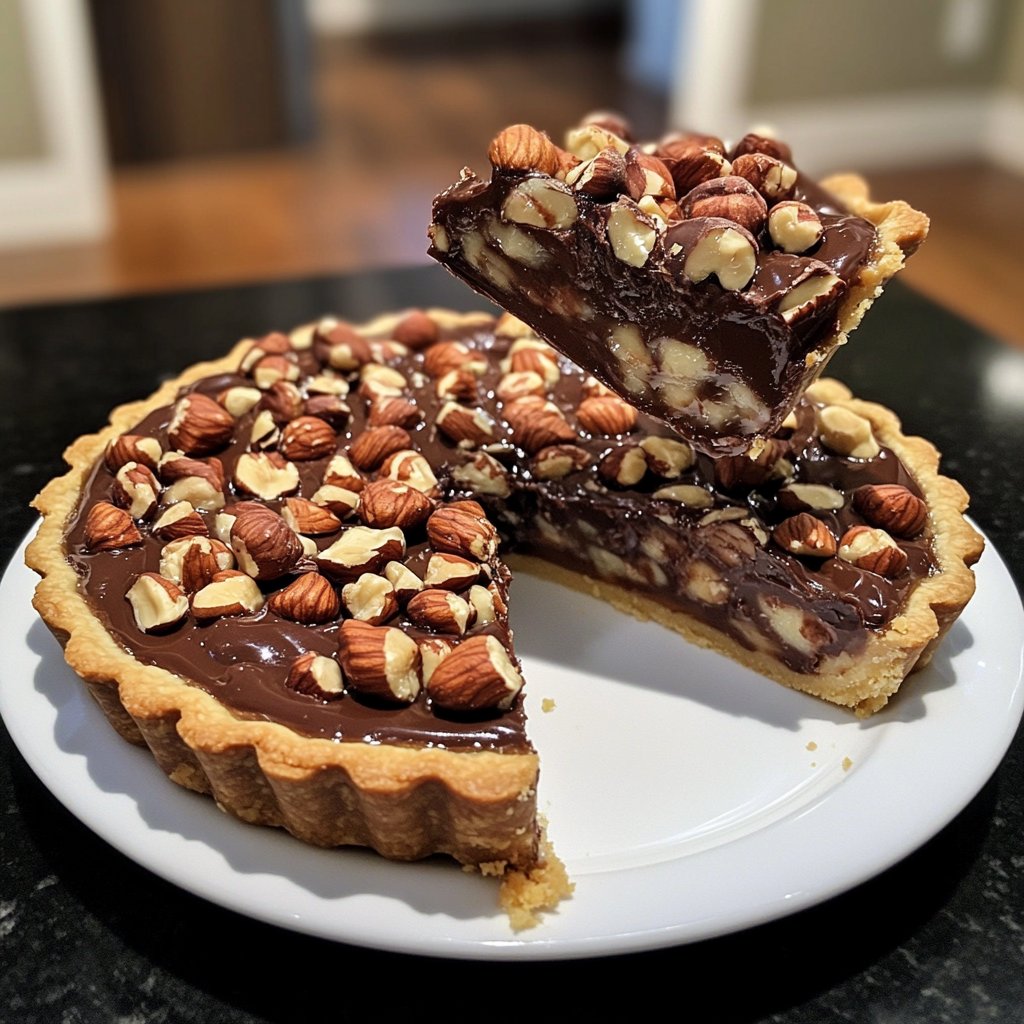
When I first experimented with this Chocolate Hazelnut Tart, I was amazed at how the flavors came together beautifully. The key is to use high-quality chocolate and freshly roasted hazelnuts, which elevate the taste significantly. I also discovered that letting the tart chill in the refrigerator for a few hours enhances its texture and flavor even further.
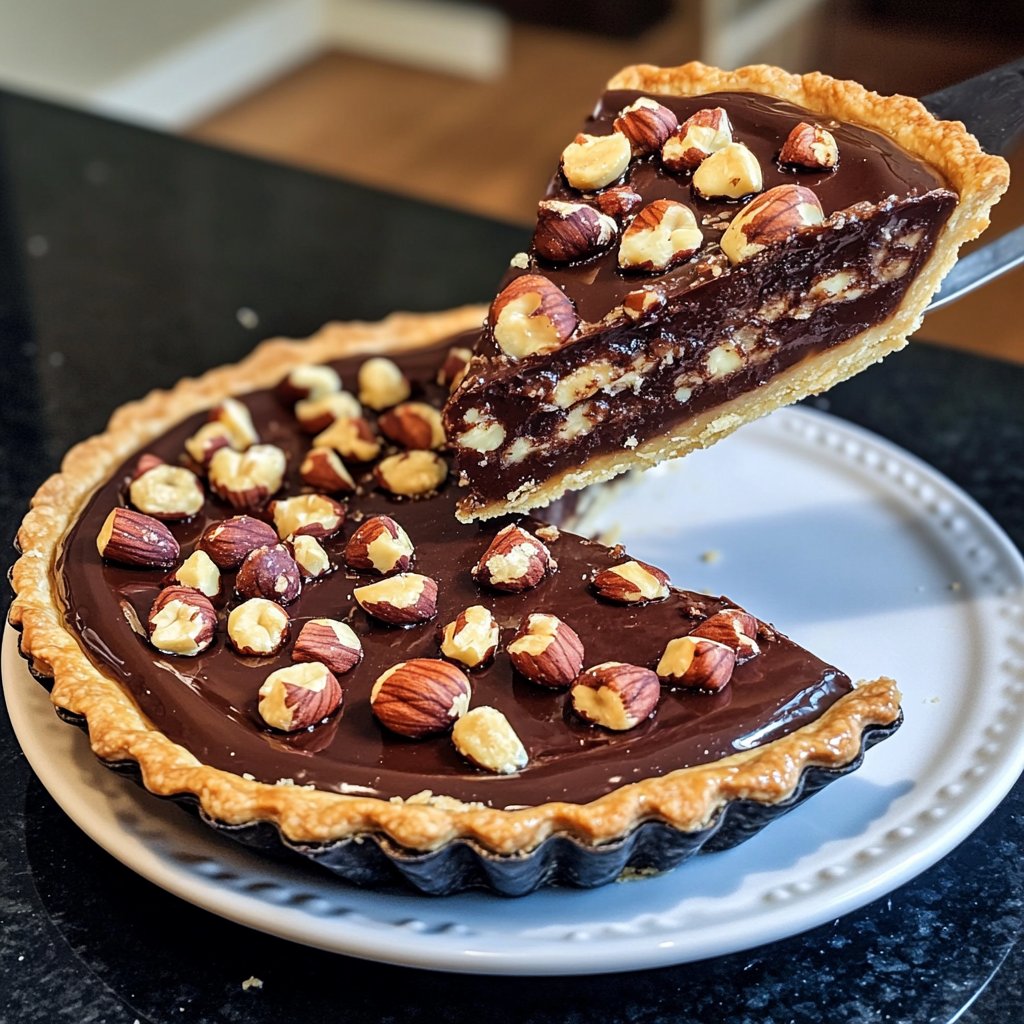
This tart is a showstopper at parties. I’ll often serve it with a dollop of whipped cream and a sprinkle of sea salt to cut through the richness. It’s a dessert that brings everyone together, and I love sharing it with those I care about.
Why You'll Love This Tart
- Rich chocolate flavor paired with crunchy hazelnuts
- Creamy texture that melts in your mouth
- Perfect for celebrations or as a sweet indulgence
The Importance of Quality Chocolate
When making this Chocolate Hazelnut Tart, the quality of the chocolate you choose is critical. Bittersweet chocolate, with its rich cocoa flavor and lower sugar content, helps to create a well-balanced filling that isn't overly sweet. I recommend selecting chocolate with at least 70% cocoa content for a deep, intense flavor. Higher quality chocolate also melts more smoothly, contributing to a luxurious texture in the final tart.
While many recipes call for chocolate chips, I find that using chopped chocolate bars produces a superior result. Chopped chocolate melts more evenly and creates a smoother filling, whereas chips can sometimes retain their shape and create a grainier texture. If you're in a pinch, feel free to use chocolate chips, but take care to stir thoroughly to ensure a consistent filling.
Mastering the Tart Crust
Creating a flaky crust is an essential part of this tart. Make sure your butter is very cold when incorporating it into the flour mixture; this helps to create those desirable flaky layers. If the dough starts to warm up during preparation, pop it back in the fridge for a few minutes. Cold dough is also easier to handle when rolling out, which is key to achieving an even thickness and avoiding cracks.
When blind baking the crust, careful attention must be paid to the timing. After the initial 15 minutes of baking with pie weights, the crust should look slightly set but still pale. It’s crucial to remove the weights at this stage so the bottom can bake thoroughly without sogginess. If the edges begin to brown too quickly, cover them with strips of aluminum foil to prevent burning while the center finishes baking.
Serving and Storing Tips
This tart is best served chilled, as refrigeration enhances the rich flavors and allows the filling to set to a perfect firm yet creamy consistency. For a decorative touch, consider topping it with a sprinkle of sea salt or a drizzle of melted chocolate just before serving. Pairing it with fresh berries or a dollop of whipped cream can also elevate the dessert experience, adding brightness and contrast to the rich chocolate.
If you're preparing this tart in advance, it keeps beautifully in the fridge for up to three days. Make sure to cover it with plastic wrap to prevent it from absorbing any odor from the fridge. I recommend waiting to add any toppings, like whipped cream or fresh fruit, until just before serving to maintain their freshness and texture.
Ingredients
Gather all your ingredients before starting for a smoother cooking experience.
For the Tart Crust
- 1 1/2 cups all-purpose flour
- 1/2 cup unsweetened cocoa powder
- 1/4 cup powdered sugar
- 1/2 cup unsalted butter, chilled and cubed
- 1 large egg yolk
- 2-3 tablespoons cold water
For the Filling
- 8 oz bittersweet chocolate, chopped
- 1/2 cup heavy cream
- 1/4 cup whole hazelnuts, toasted and chopped
- 3 large eggs
- 1/2 cup granulated sugar
- 1 teaspoon vanilla extract
Make sure to measure ingredients accurately for the best results.
Instructions
Follow these steps carefully to prepare your tart.
Prepare the Tart Crust
In a mixing bowl, combine the flour, cocoa powder, and powdered sugar. Add the cubed butter and mix until it resembles coarse crumbs. Stir in the egg yolk and cold water until the dough comes together. Chill for 30 minutes.
Blind Bake the Crust
Preheat your oven to 350°F (175°C). Roll out the chilled dough and press it into a tart pan. Line the crust with parchment paper and fill it with pie weights. Bake for 15 minutes, then remove weights and bake for an additional 10 minutes. Let it cool.
Make the Filling
In a saucepan, heat the heavy cream until just simmering. Pour it over the chopped chocolate and let it sit for 2 minutes. Stir until smooth, then whisk in the eggs, sugar, and vanilla extract. Fold in the chopped hazelnuts.
Bake the Tart
Pour the filling into the cooled tart crust and smooth the top. Bake for 25 minutes or until set but slightly jiggly in the center. Allow to cool slightly, then refrigerate for at least 2 hours before serving.
Don’t forget to garnish your tart before serving for an extra touch!
Pro Tips
- For a fancier presentation, you can drizzle some melted chocolate over the top of the tart before serving. Also, consider pairing with fresh berries for a lovely contrast of flavors.
Ingredient Substitutions
If you're looking to make this tart gluten-free, consider substituting the all-purpose flour in the crust with a gluten-free blend designed for baking. Just ensure it contains a binding agent like xanthan gum to replicate the structure provided by wheat flour. Additionally, almond flour can bring extra nuttiness that complements the hazelnuts beautifully.
For those who wish to reduce sugar, you can experiment with alternatives like coconut sugar or a sugar substitute designed for baking. Keep in mind that some substitutes may affect the texture and flavor, so it's a good practice to start with half the amount and adjust to taste.
Scaling Up the Recipe
If you're planning to serve a larger crowd, this recipe can easily be scaled up. Simply double the ingredients and use a larger tart pan or multiple smaller tart pans. Adjust the baking time slightly, as a larger tart may require more time to bake through than the original recipe specifies. Always check for doneness by lightly shaking the tart—the center should be set but still have a slight jiggle.
For biennial gatherings, mini versions of this tart can also be delightful. Using a muffin tin, you can create individual tarts. Adjust the baking time to about 15-20 minutes, checking for a set filling that's not too jiggly. They make for elegant desserts and are conveniently portioned for guests.
Troubleshooting Common Issues
One common issue when making the tart is an overly crumbly crust that won’t hold together. This can happen if there wasn't enough water added to the dough. If you encounter this, do not fear! Just sprinkle in a bit more cold water, a teaspoon at a time, until the dough binds nicely. Remember, it should feel soft but not sticky.
If your filling turns out grainy after melting the chocolate, it's likely that the chocolate got too hot, causing it to seize. To fix this, try to mix in a little bit of warm cream, whisking until smooth. To prevent this in the future, always melt the chocolate slowly over low heat or using a double boiler to maintain its glossy texture without overheating.
Questions About Recipes
→ Can I use different nuts in this tart?
Yes, you can substitute hazelnuts with almonds or pecans, but the flavor will change slightly.
→ How long will the tart keep?
The tart can be kept in the fridge for up to 5 days if stored in an airtight container.
→ Can I make the crust ahead of time?
Absolutely! You can prepare and bake the crust a day or two in advance.
→ Is there a dairy-free option for this recipe?
Yes! You can use coconut cream and dairy-free chocolate to make it dairy-free.
Chocolate Hazelnut Tart
Created by: Aubrey Collins
Recipe Type: Everyday Baking Joy
Skill Level: Intermediate
Final Quantity: 8 servings
What You'll Need
For the Tart Crust
- 1 1/2 cups all-purpose flour
- 1/2 cup unsweetened cocoa powder
- 1/4 cup powdered sugar
- 1/2 cup unsalted butter, chilled and cubed
- 1 large egg yolk
- 2-3 tablespoons cold water
For the Filling
- 8 oz bittersweet chocolate, chopped
- 1/2 cup heavy cream
- 1/4 cup whole hazelnuts, toasted and chopped
- 3 large eggs
- 1/2 cup granulated sugar
- 1 teaspoon vanilla extract
How-To Steps
In a mixing bowl, combine the flour, cocoa powder, and powdered sugar. Add the cubed butter and mix until it resembles coarse crumbs. Stir in the egg yolk and cold water until the dough comes together. Chill for 30 minutes.
Preheat your oven to 350°F (175°C). Roll out the chilled dough and press it into a tart pan. Line the crust with parchment paper and fill it with pie weights. Bake for 15 minutes, then remove weights and bake for an additional 10 minutes. Let it cool.
In a saucepan, heat the heavy cream until just simmering. Pour it over the chopped chocolate and let it sit for 2 minutes. Stir until smooth, then whisk in the eggs, sugar, and vanilla extract. Fold in the chopped hazelnuts.
Pour the filling into the cooled tart crust and smooth the top. Bake for 25 minutes or until set but slightly jiggly in the center. Allow to cool slightly, then refrigerate for at least 2 hours before serving.
Extra Tips
- For a fancier presentation, you can drizzle some melted chocolate over the top of the tart before serving. Also, consider pairing with fresh berries for a lovely contrast of flavors.
Nutritional Breakdown (Per Serving)
- Calories: 380 kcal
- Total Fat: 26g
- Saturated Fat: 15g
- Cholesterol: 195mg
- Sodium: 85mg
- Total Carbohydrates: 32g
- Dietary Fiber: 3g
- Sugars: 24g
- Protein: 6g